We use cloth pads for two reasons. 1. To save money. 2. No chemicals, therefore, better for our bodies.
I know some women who go all out when making their cloth pads. They will spend up to $30 for the decorative top layer of fabric and about the same on PUL for the backing material and then spend even more for the inner layers and specialty snaps as well. While, this is still cheaper than purchasing disposables and still healthier, I don't see the need in all of that.
First, I created my own template for pads using a few other patterns and a purchased cloth pad for ideas. When I first created this template, I would also make "wings" and then add velcro for the closure, but have since come up with and even easier, quicker, and more comfortable option-the bottom of onesies. I have a large supply of onesies that were stained at the top, but the snaps were just fine. I use all scrap fabric for each layer as well. I have a bin where I will put left over pieces of fabric from sewing projects to use for these. I will coordinate the colors as best as possible, but in all honesty, that isn't a need if you just want to be frugal.
Recently, I spent about an hour cutting out the layers for a dozen pads. I then was able to put together a pad in about 10 minutes of sewing time and I would just do one or two as I had time during the next week.
This is the template I created. I made it on an old Shutterly envelope so it is sturdy and I can fold it in half for storage.
Here are my pieces. On the left is the bottom of an onesie. The next are layers of flannel for the inner core. I sometimes use knit or a combination of knit and flannel. The pink is fleece which I use as my backer. I have never had one leak through the fleece. The top layer is cotton.
My first step is to "quilt" the core to the topper. This time I just used straight stitches, but sometimes I have fun and use a decorative stitch.
Here is what it looks like on the underside.
Then I layer the pieces like this. Fleece right side up, onesie bottom, and topper wrong side up.
Sew around the edges leaving a section open for turning.
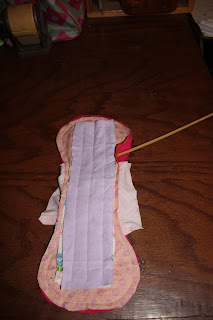
I use a chopstick to make sure all the edges are completely turned.
Then I topstitch around which will close the opening as well as help the pad to lay flat.
I do make another style that one of my girls prefer and a friend of mine has used and prefers them as well. Maybe I'll take pictures and do another tutorial of that style the next time I make more of them.
As far as the practical application, we have a small bucket in the bathroom with a pail liner. We keep the used pads in there until we wash them. We wash them with the cloth diapers and/or towels. I know some people who wash with their regular clothing, but we always have cloth diapers to wash so we just combine them.
What are your thoughts on cloth pads? Do you use them? Would you like another tutorial on another style? Share your comments below.


No comments:
Post a Comment